
3.6: Creating an Empty or Null Alt Attribute for Decorative Images
- Page ID
- 51903

A decorative image is one that doesn’t convey meaning nor add information to the page. Examples of decorative images include:
- Images that serve as borders, spacers, corners, flourishes
- Images adjacent to text that convey the same meaning or information as the text, e.g. an image of Abraham Lincoln next to the text link “Abraham Lincoln.” You want to avoid redundancy when a screen reader reads what is there.
- Images adjacent to text that serve as “eye-candy,” or “ambience,” and don’t add information.
- Images used next to link text simply to improve its appearance or increase its clickable area
Decorative images require the addition of an empty or null alt attribute in the HTML Code View that will tell the screen reader to skip over the image. An empty alt attribute is written as alt=” ” with a space between the double quotes. A null alt text is written as alt=”” with no space between the set of quotes. Without a null or empty alt attribute, the screen reader will announce that there is an image, and possibly give its dimensions, but leave the audience wondering what the image is and if it is important.
You can produce an empty alt attribute (alt=” “) by typing one space with your spacebar within the Image Description field when inserting an image with Blackboard’s content editor. This is the easy route. When the content is read back with JAWS 17 in Firefox, it will skip over the images without announcing them at all. NVDA will announce “graphic” but give no dimensions or other information. If you use a null alt attribute on an image, NVDA will skip over it without announcing it. JAWS 17 will also skip over an image without announcing it when there is a null alt attribute set. Therefore, it’s best practice to create a null alt attribute on a decorative image or one that doesn’t convey information that is not on the page.
Below is an example of a decorative image of a flourish that might be used at the top of a page or a separator for sections of a document. It would require the null alt attribute on the image element in HTML. The HTML code for this image would look like the following:
<img src=”flourish.jpg alt=””>

***IMPORTANT: Blackboard’s content editor, won’t create null alt text attributes on an image if you simply leave the Image Description blank when inserting an image. That is, if you leave the Image Description field blank and then click on the HTML Code View button after you have inserted the image, you won’t see <img alt=””> anywhere.
To setup an image with null alt text, insert the image with the Insert/Edit Image icon as you would normally, but leave the Image Description field empty, as seen in the image below. Don’t worry about this right now.
When you get a pop-up dialogue window warning you that you need to include an image description to make the image accessible, click OK. When that dialogue disappears, click Insert to finish inserting your image.
Next, you’ll need to toggle into HTML Code View using the HTML icon which is second from the right in the third row, to edit the code.
You’ll see the code that Blackboard’s content editor created for the image. It will look like the following:
<img src=”https–csuohio.blackboard.com/sessions/3/4/2/0/8/8/4/7/session/ff9f70436e4a4ab9a27a283871716715/flourish%281%29.gif” height=”105″ width=”659″ />.
You can see the really long location and name change that Blackboard created for the image, ending in the file format, which is gif. You’ll also see height and width attributes. You can add a null alt attribute any where after img plus a space. We’ll add it just after the source (src) pathway to the gif. Place your cursor just before the h in height and type alt=””, and then a space. The code will now look like:
<img src=”https://bb–csuohio.blackboard.com/sessions/3/4/2/0/8/8/4/7/session/ff9f70436e4a4ab9a27a283871716715/flourish%281%29.gif” alt=”” height=”105″ width=”659″ />
Creating a Fluid Image Size
We’ll make the image respond to changes in the browser window size, by changing its width to a percent value. Setting its width to a percentage of the container it is in, will allow it to scale proportionately downward with a decrease in window size. This technique can also avoid the need for horizontal scrolling if the window gets smaller than the width of the picture. We’ll delete height=”105″ and width=”659″ from the code above, so that it looks like the following:
<img src=”https://bb.blackboard.com/sessions/3...ish%281%29.gif” alt=”” />
We’ll now create a width that uses percent as a value. I’ll use 90%. I like to make the image slightly less than 100% of its container, to create some white space on the left and right of the image. To enter the width=”90%”, I leave a space after alt=”” and type the new property. The final code will look like:
<img src=”https://bb–csuohio.blackboard.com/sessions/3/4/2/0/8/8/4/7/session/ff9f70436e4a4ab9a27a283871716715/flourish%281%29.gif” alt=”” width=”90%” />
A note about image sizing: If your image dimension in pixels is a smaller percentage of the parent container than the percent that you write, there will be some scaling up, which could lead to a less detailed display of the image. Blackboard’s content area scales down to a minimum width of 1150 pixels before it stops responding to a decrease in the width of the browser’s display.
Below is a comparison chart you can use to determine the percentage that an image of a certain numbers of pixels will take up when Blackboard’s content area is scaled down to its minimum width. If the browser window is scaled up, the image will still occupy the percentage of space that you designate, but pixels will not be added to your image to maintain image quality.
| Width of image in pixels | Width of image in percent |
|---|---|
| 1150 | 100% |
| 1092.5 | 95% |
| 1035 | 90% |
| 977.5 | 85% |
| 920 | 80% |
| 862.5 | 75% |
| 805 | 70% |
| 747.5 | 65% |
| 690 | 60% |
| 632.5 | 55% |
| 575 | 50% |
| 517.5 | 45% |
| 460 | 40% |
| 402.5 | 35% |
| 345 | 30% |
| 287.5 | 25% |
| 230 | 20% |
| 172.5 | 15% |
| 115 | 10% |
| 57.5 | 5% |
There is another method to make the image respond to a decreased screen size and eliminate the need for horizontal scrolling, but the execution isn’t perfect within Blackboard. Blackboard clips a small portion of the image on the right side. This method uses the max-width property for sizing the image. With the HTML Code View, you set the max-width of the image to be 100% of the containing parent element, and set the height to auto. In this case, the image will scale down to fit a window smaller than its original width in pixels (down to the minimum width of 1150 pixels in Blackboard), but it won’t scale up if the window size is larger than its width in pixels. The code would look like the following:
<img alt=”” src=”https://bb–csuohio.blackboard.com/bbcswebdav/pid-2020261-dt-content-rid-11186514_1/xid-11186514_1″ style=”max-width: 100%; height: auto;” />
Decorative Image Example #2:
The following example shows the use of an image (the Start button) beside text to draw the user’s eye to important information. This helps sighted users and can help people with low vision or cognitive impairments orient. The image of a round button that says “Start” repeats the same information or has the same meaning as the text heading “Start Here” which is located above it. So, it won’t add meaning for someone listening to a screen reader. Therefore, we’ll but a null alt attribute on this image so that a screen reader skips over it.
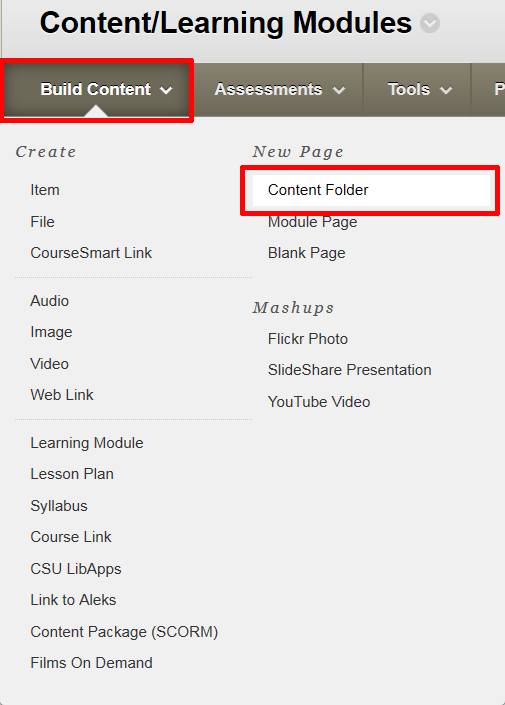
The yellow folder icon indicates that the author added a folder of content to her Blackboard course. To create the folder called “Start Here!” you can add a Content Folder from the Build Content menu on Blackboard’s Action Bar, with Edit mode On.
Type the name of your Content Folder, such as Start Here! in the Name text entry box.

To create the Start button image to the left of the text description of the folder, you can copy and paste the following code within HTML Code View for the Text description box:
<div style=”color: #000; padding: 1.5em; font-size: 1 em; font-weight: bold; font-family: Arial, Helvetica, sans-serif;”><img src=”https://bb-csuohio.blackboard.com/bb...xid-11267299_1″ style=”margin: 0px 10px;” height=”50″ width=”50″ alt=”” /> This folder contains instructions and a general overview of the course.</div>
The image below shows the code pasted into the HTML Code View dialogue window, superimposed over the WYSIWYG editor. Note that the spell checker button, outlined in red, is turned off. It is the ABC icon with the check mark. This is to avoid the unnecessary insertion of <span> elements in your code, due to a bug in the current version of Blackboard Learn. The HTML button clicked to enter into HTML Code View is also outlined in red.
*** Note: This code will work for centering the alignment vertically for one small image and one short line of text beside it. If you have a larger image and want to wrap a paragraph of text to the right of it within Blackboard Learn’s content editor, please see the section on Creating a Fluid Wrap of Text Around an Image.