3.1: Blood Typing Lab
- Page ID
- 138514
\( \newcommand{\vecs}[1]{\overset { \scriptstyle \rightharpoonup} {\mathbf{#1}} } \)
\( \newcommand{\vecd}[1]{\overset{-\!-\!\rightharpoonup}{\vphantom{a}\smash {#1}}} \)
\( \newcommand{\dsum}{\displaystyle\sum\limits} \)
\( \newcommand{\dint}{\displaystyle\int\limits} \)
\( \newcommand{\dlim}{\displaystyle\lim\limits} \)
\( \newcommand{\id}{\mathrm{id}}\) \( \newcommand{\Span}{\mathrm{span}}\)
( \newcommand{\kernel}{\mathrm{null}\,}\) \( \newcommand{\range}{\mathrm{range}\,}\)
\( \newcommand{\RealPart}{\mathrm{Re}}\) \( \newcommand{\ImaginaryPart}{\mathrm{Im}}\)
\( \newcommand{\Argument}{\mathrm{Arg}}\) \( \newcommand{\norm}[1]{\| #1 \|}\)
\( \newcommand{\inner}[2]{\langle #1, #2 \rangle}\)
\( \newcommand{\Span}{\mathrm{span}}\)
\( \newcommand{\id}{\mathrm{id}}\)
\( \newcommand{\Span}{\mathrm{span}}\)
\( \newcommand{\kernel}{\mathrm{null}\,}\)
\( \newcommand{\range}{\mathrm{range}\,}\)
\( \newcommand{\RealPart}{\mathrm{Re}}\)
\( \newcommand{\ImaginaryPart}{\mathrm{Im}}\)
\( \newcommand{\Argument}{\mathrm{Arg}}\)
\( \newcommand{\norm}[1]{\| #1 \|}\)
\( \newcommand{\inner}[2]{\langle #1, #2 \rangle}\)
\( \newcommand{\Span}{\mathrm{span}}\) \( \newcommand{\AA}{\unicode[.8,0]{x212B}}\)
\( \newcommand{\vectorA}[1]{\vec{#1}} % arrow\)
\( \newcommand{\vectorAt}[1]{\vec{\text{#1}}} % arrow\)
\( \newcommand{\vectorB}[1]{\overset { \scriptstyle \rightharpoonup} {\mathbf{#1}} } \)
\( \newcommand{\vectorC}[1]{\textbf{#1}} \)
\( \newcommand{\vectorD}[1]{\overrightarrow{#1}} \)
\( \newcommand{\vectorDt}[1]{\overrightarrow{\text{#1}}} \)
\( \newcommand{\vectE}[1]{\overset{-\!-\!\rightharpoonup}{\vphantom{a}\smash{\mathbf {#1}}}} \)
\( \newcommand{\vecs}[1]{\overset { \scriptstyle \rightharpoonup} {\mathbf{#1}} } \)
\(\newcommand{\longvect}{\overrightarrow}\)
\( \newcommand{\vecd}[1]{\overset{-\!-\!\rightharpoonup}{\vphantom{a}\smash {#1}}} \)
\(\newcommand{\avec}{\mathbf a}\) \(\newcommand{\bvec}{\mathbf b}\) \(\newcommand{\cvec}{\mathbf c}\) \(\newcommand{\dvec}{\mathbf d}\) \(\newcommand{\dtil}{\widetilde{\mathbf d}}\) \(\newcommand{\evec}{\mathbf e}\) \(\newcommand{\fvec}{\mathbf f}\) \(\newcommand{\nvec}{\mathbf n}\) \(\newcommand{\pvec}{\mathbf p}\) \(\newcommand{\qvec}{\mathbf q}\) \(\newcommand{\svec}{\mathbf s}\) \(\newcommand{\tvec}{\mathbf t}\) \(\newcommand{\uvec}{\mathbf u}\) \(\newcommand{\vvec}{\mathbf v}\) \(\newcommand{\wvec}{\mathbf w}\) \(\newcommand{\xvec}{\mathbf x}\) \(\newcommand{\yvec}{\mathbf y}\) \(\newcommand{\zvec}{\mathbf z}\) \(\newcommand{\rvec}{\mathbf r}\) \(\newcommand{\mvec}{\mathbf m}\) \(\newcommand{\zerovec}{\mathbf 0}\) \(\newcommand{\onevec}{\mathbf 1}\) \(\newcommand{\real}{\mathbb R}\) \(\newcommand{\twovec}[2]{\left[\begin{array}{r}#1 \\ #2 \end{array}\right]}\) \(\newcommand{\ctwovec}[2]{\left[\begin{array}{c}#1 \\ #2 \end{array}\right]}\) \(\newcommand{\threevec}[3]{\left[\begin{array}{r}#1 \\ #2 \\ #3 \end{array}\right]}\) \(\newcommand{\cthreevec}[3]{\left[\begin{array}{c}#1 \\ #2 \\ #3 \end{array}\right]}\) \(\newcommand{\fourvec}[4]{\left[\begin{array}{r}#1 \\ #2 \\ #3 \\ #4 \end{array}\right]}\) \(\newcommand{\cfourvec}[4]{\left[\begin{array}{c}#1 \\ #2 \\ #3 \\ #4 \end{array}\right]}\) \(\newcommand{\fivevec}[5]{\left[\begin{array}{r}#1 \\ #2 \\ #3 \\ #4 \\ #5 \\ \end{array}\right]}\) \(\newcommand{\cfivevec}[5]{\left[\begin{array}{c}#1 \\ #2 \\ #3 \\ #4 \\ #5 \\ \end{array}\right]}\) \(\newcommand{\mattwo}[4]{\left[\begin{array}{rr}#1 \amp #2 \\ #3 \amp #4 \\ \end{array}\right]}\) \(\newcommand{\laspan}[1]{\text{Span}\{#1\}}\) \(\newcommand{\bcal}{\cal B}\) \(\newcommand{\ccal}{\cal C}\) \(\newcommand{\scal}{\cal S}\) \(\newcommand{\wcal}{\cal W}\) \(\newcommand{\ecal}{\cal E}\) \(\newcommand{\coords}[2]{\left\{#1\right\}_{#2}}\) \(\newcommand{\gray}[1]{\color{gray}{#1}}\) \(\newcommand{\lgray}[1]{\color{lightgray}{#1}}\) \(\newcommand{\rank}{\operatorname{rank}}\) \(\newcommand{\row}{\text{Row}}\) \(\newcommand{\col}{\text{Col}}\) \(\renewcommand{\row}{\text{Row}}\) \(\newcommand{\nul}{\text{Nul}}\) \(\newcommand{\var}{\text{Var}}\) \(\newcommand{\corr}{\text{corr}}\) \(\newcommand{\len}[1]{\left|#1\right|}\) \(\newcommand{\bbar}{\overline{\bvec}}\) \(\newcommand{\bhat}{\widehat{\bvec}}\) \(\newcommand{\bperp}{\bvec^\perp}\) \(\newcommand{\xhat}{\widehat{\xvec}}\) \(\newcommand{\vhat}{\widehat{\vvec}}\) \(\newcommand{\uhat}{\widehat{\uvec}}\) \(\newcommand{\what}{\widehat{\wvec}}\) \(\newcommand{\Sighat}{\widehat{\Sigma}}\) \(\newcommand{\lt}{<}\) \(\newcommand{\gt}{>}\) \(\newcommand{\amp}{&}\) \(\definecolor{fillinmathshade}{gray}{0.9}\)Blood Typing
Supplies Needed
- Milk, vinegar, water
- Red gel food coloring
- Eyedroppers or pipettes (5 per group)
- Permanent marker
- Toothpicks or stirrers (6 per group)
- Small containers or sealable test tubes (5 per group)
- Blood typing test plate (attached) laminated or placed in a plastic sheet protector (1 per group)
- Student worksheet (attached)
Readings
Introduction
Steps
- Prepare three solutions: vinegar with food coloring, milk with food coloring, and water with food coloring. Slowly add food coloring little by little to ensure that the dye does not coagulate the substance.
- Each group of students should be given the following lab kit materials:
- Labelled test tubes or small containers:
- Individual #1: Dyed vinegar (this will simulate Type A blood)
- Individual #2: Dyed milk (this will simulate Type B blood)
- Individual #3: Dyed water (this will simulate Type O blood)
- Anti-A Serum: Milk
- Anti-B Serum: Vinegar
- Five eyedroppers or pipettes
- Permanent marker
- Six toothpicks or stirrers
- Blood Typing Test Plate (attached) laminated or placed in a plastic sheet protector (1 per group)
- Student worksheets
- Labelled test tubes or small containers:
- Students should use the instructions on their worksheet to complete the lab. When students perform the experiment, they must use each pipette for only the substance it is intended to be used for, as cross-contamination may provide false coagulations.
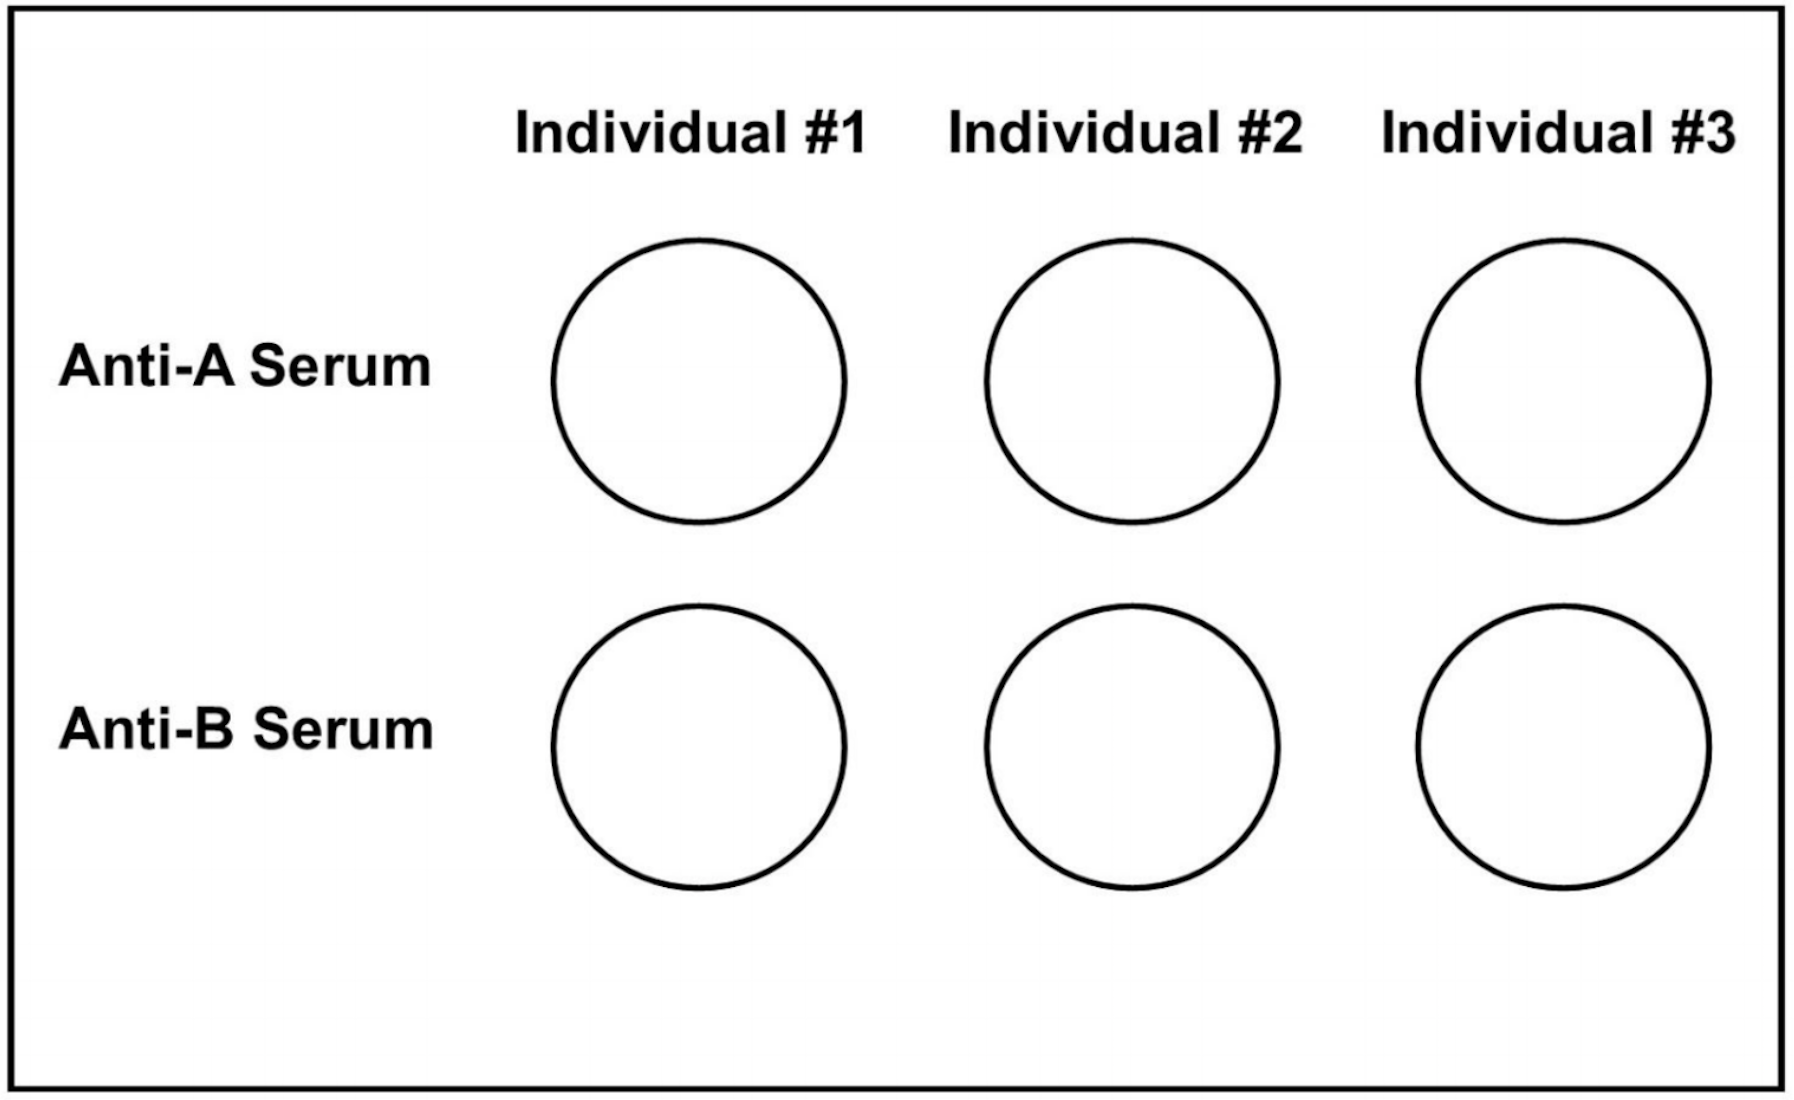
- Using the pipette for Individual #1, they will pipette several drops of Individual #1’s blood sample into the circles comprising the first column of the laminated blood typing test plate. Individual #2’s sample should be pipetted into to the second column, and Individual #3’s sample pipetted into the third column.
- Using the pipette for Anti-A Serum, pipette several drops of Anti-A serum into each blood sample in the first row of the test plate. Using the pipette for Anti-B Serum, pipette several drops of Anti-B serum into each blood sample in the second row of the test plate.
- Students will stir each sample using a different toothpick for each of the six samples.
- Students will observe each sample to see if it has coagulated (agglutinated) or not, and determine the three individuals’ blood types based on the results.
- Students will complete the reflection questions on their worksheet.
Conclusion
Adapting for Online Learning
For Further Exploration
References
Image Attributions
Blood Typing: Worksheet
Background
- Blood types in the ABO Blood Group System are A, B, O, and AB.
- A and B alleles are dominant over the O allele, and are codominant with each other. This is because possessing the A or B allele always leads to the production of the corresponding antigen.
Blood Types Table

- Type A blood with A antigens will coagulate (agglutinate) when they come in contact with anti-A serum (antibodies), but produce anti-B antibodies in a living person, so will not coagulate with anti-B serum.
- Type B blood with B antigens will coagulate (agglutinate) when they come in contact with anti-B serum (antibodies), but produce anti-A antibodies in a living person, so will not coagulate with anti-A serum.
- Type AB blood has both A and B antigens, and will coagulate (agglutinate) when they come in contact with either anti-A or anti-B serum (antibodies). These individuals do not produce anti-A or anti-B antibodies.
- Type O blood produces both anti-A and anti-B antibodies, so it will not coagulate with Anti-A or Anti-B Serum.
Lab Kit Materials
- Labelled test tubes or small containers:
- Individual #1 Blood Sample
- Individual #2 Blood Sample
- Individual #3 Blood Sample
- Anti-A Serum
- Anti-B Serum
- Five eyedroppers or pipettes
- Permanent marker
- Six toothpicks or stirrers
- Blood Typing Test Plate laminated or placed in a plastic sheet protector
Instructions
- Using the permanent marker, label each of your five pipettes with one of the substance names (e.g. Individual #1, Anti-A serum). When you perform the experiment, you must ensure that you use each pipette for only the substance it is intended to be used for, as cross-contamination may provide false coagulations.
- Using the pipette for Individual #1, pipette several drops of Individual #1’s blood sample into the circles comprising the first column of the blood typing test plate. Individual #2’s sample should be pipetted into to the second column, and Individual #3’s sample pipetted into the third column.
- Using the pipette for Anti-A Serum, pipette several drops of Anti-A serum into each blood sample in the first row of the test plate. Using the pipette for Anti-B Serum, pipette several drops of Anti-B serum into each blood sample in the second row of the test plate.
- Using a different toothpick for each of the six samples, stir each sample.
- Observe each sample to see if it has coagulated (agglutinated) or not.
Reflection Questions
Blood Typing Test Plate