1.11: Screen Magnification Software for Accessing Online Content
- Page ID
- 51883
\( \newcommand{\vecs}[1]{\overset { \scriptstyle \rightharpoonup} {\mathbf{#1}} } \)
\( \newcommand{\vecd}[1]{\overset{-\!-\!\rightharpoonup}{\vphantom{a}\smash {#1}}} \)
\( \newcommand{\id}{\mathrm{id}}\) \( \newcommand{\Span}{\mathrm{span}}\)
( \newcommand{\kernel}{\mathrm{null}\,}\) \( \newcommand{\range}{\mathrm{range}\,}\)
\( \newcommand{\RealPart}{\mathrm{Re}}\) \( \newcommand{\ImaginaryPart}{\mathrm{Im}}\)
\( \newcommand{\Argument}{\mathrm{Arg}}\) \( \newcommand{\norm}[1]{\| #1 \|}\)
\( \newcommand{\inner}[2]{\langle #1, #2 \rangle}\)
\( \newcommand{\Span}{\mathrm{span}}\)
\( \newcommand{\id}{\mathrm{id}}\)
\( \newcommand{\Span}{\mathrm{span}}\)
\( \newcommand{\kernel}{\mathrm{null}\,}\)
\( \newcommand{\range}{\mathrm{range}\,}\)
\( \newcommand{\RealPart}{\mathrm{Re}}\)
\( \newcommand{\ImaginaryPart}{\mathrm{Im}}\)
\( \newcommand{\Argument}{\mathrm{Arg}}\)
\( \newcommand{\norm}[1]{\| #1 \|}\)
\( \newcommand{\inner}[2]{\langle #1, #2 \rangle}\)
\( \newcommand{\Span}{\mathrm{span}}\) \( \newcommand{\AA}{\unicode[.8,0]{x212B}}\)
\( \newcommand{\vectorA}[1]{\vec{#1}} % arrow\)
\( \newcommand{\vectorAt}[1]{\vec{\text{#1}}} % arrow\)
\( \newcommand{\vectorB}[1]{\overset { \scriptstyle \rightharpoonup} {\mathbf{#1}} } \)
\( \newcommand{\vectorC}[1]{\textbf{#1}} \)
\( \newcommand{\vectorD}[1]{\overrightarrow{#1}} \)
\( \newcommand{\vectorDt}[1]{\overrightarrow{\text{#1}}} \)
\( \newcommand{\vectE}[1]{\overset{-\!-\!\rightharpoonup}{\vphantom{a}\smash{\mathbf {#1}}}} \)
\( \newcommand{\vecs}[1]{\overset { \scriptstyle \rightharpoonup} {\mathbf{#1}} } \)
\( \newcommand{\vecd}[1]{\overset{-\!-\!\rightharpoonup}{\vphantom{a}\smash {#1}}} \)
\(\newcommand{\avec}{\mathbf a}\) \(\newcommand{\bvec}{\mathbf b}\) \(\newcommand{\cvec}{\mathbf c}\) \(\newcommand{\dvec}{\mathbf d}\) \(\newcommand{\dtil}{\widetilde{\mathbf d}}\) \(\newcommand{\evec}{\mathbf e}\) \(\newcommand{\fvec}{\mathbf f}\) \(\newcommand{\nvec}{\mathbf n}\) \(\newcommand{\pvec}{\mathbf p}\) \(\newcommand{\qvec}{\mathbf q}\) \(\newcommand{\svec}{\mathbf s}\) \(\newcommand{\tvec}{\mathbf t}\) \(\newcommand{\uvec}{\mathbf u}\) \(\newcommand{\vvec}{\mathbf v}\) \(\newcommand{\wvec}{\mathbf w}\) \(\newcommand{\xvec}{\mathbf x}\) \(\newcommand{\yvec}{\mathbf y}\) \(\newcommand{\zvec}{\mathbf z}\) \(\newcommand{\rvec}{\mathbf r}\) \(\newcommand{\mvec}{\mathbf m}\) \(\newcommand{\zerovec}{\mathbf 0}\) \(\newcommand{\onevec}{\mathbf 1}\) \(\newcommand{\real}{\mathbb R}\) \(\newcommand{\twovec}[2]{\left[\begin{array}{r}#1 \\ #2 \end{array}\right]}\) \(\newcommand{\ctwovec}[2]{\left[\begin{array}{c}#1 \\ #2 \end{array}\right]}\) \(\newcommand{\threevec}[3]{\left[\begin{array}{r}#1 \\ #2 \\ #3 \end{array}\right]}\) \(\newcommand{\cthreevec}[3]{\left[\begin{array}{c}#1 \\ #2 \\ #3 \end{array}\right]}\) \(\newcommand{\fourvec}[4]{\left[\begin{array}{r}#1 \\ #2 \\ #3 \\ #4 \end{array}\right]}\) \(\newcommand{\cfourvec}[4]{\left[\begin{array}{c}#1 \\ #2 \\ #3 \\ #4 \end{array}\right]}\) \(\newcommand{\fivevec}[5]{\left[\begin{array}{r}#1 \\ #2 \\ #3 \\ #4 \\ #5 \\ \end{array}\right]}\) \(\newcommand{\cfivevec}[5]{\left[\begin{array}{c}#1 \\ #2 \\ #3 \\ #4 \\ #5 \\ \end{array}\right]}\) \(\newcommand{\mattwo}[4]{\left[\begin{array}{rr}#1 \amp #2 \\ #3 \amp #4 \\ \end{array}\right]}\) \(\newcommand{\laspan}[1]{\text{Span}\{#1\}}\) \(\newcommand{\bcal}{\cal B}\) \(\newcommand{\ccal}{\cal C}\) \(\newcommand{\scal}{\cal S}\) \(\newcommand{\wcal}{\cal W}\) \(\newcommand{\ecal}{\cal E}\) \(\newcommand{\coords}[2]{\left\{#1\right\}_{#2}}\) \(\newcommand{\gray}[1]{\color{gray}{#1}}\) \(\newcommand{\lgray}[1]{\color{lightgray}{#1}}\) \(\newcommand{\rank}{\operatorname{rank}}\) \(\newcommand{\row}{\text{Row}}\) \(\newcommand{\col}{\text{Col}}\) \(\renewcommand{\row}{\text{Row}}\) \(\newcommand{\nul}{\text{Nul}}\) \(\newcommand{\var}{\text{Var}}\) \(\newcommand{\corr}{\text{corr}}\) \(\newcommand{\len}[1]{\left|#1\right|}\) \(\newcommand{\bbar}{\overline{\bvec}}\) \(\newcommand{\bhat}{\widehat{\bvec}}\) \(\newcommand{\bperp}{\bvec^\perp}\) \(\newcommand{\xhat}{\widehat{\xvec}}\) \(\newcommand{\vhat}{\widehat{\vvec}}\) \(\newcommand{\uhat}{\widehat{\uvec}}\) \(\newcommand{\what}{\widehat{\wvec}}\) \(\newcommand{\Sighat}{\widehat{\Sigma}}\) \(\newcommand{\lt}{<}\) \(\newcommand{\gt}{>}\) \(\newcommand{\amp}{&}\) \(\definecolor{fillinmathshade}{gray}{0.9}\)People with low vision include those with part of their field of view blocked, or blurred. Glaucoma causes tunnel vision, reducing the field of view around the outer edges. Macular degeneration causes blockage of vision in the central part of the eye. Cataracts will cause blurred vision. People with low vision frequently use magnification programs to view the computer screen. Operating systems have built-in magnifiers and there are third party ones that are more feature rich. Screen magnifiers built into operating systems are Windows Magnifier on the Windows platform and Zoom on MacOS and iOS. More feature rich magnification programs are ZoomText and MAGic. Screen magnifiers typically provide features like variable magnification, color contrast adjustment, text to speech, and tools for helping with cursor tracking and focus.
Some users will magnify what they see in a browser by pressing the CTRL key followed by the + key on their keyboard. They zoom back out by pressing CTRL – . Users can also increase the font size within their browser settings to be greater than the default 16 pixels.
Seeing a small portion of the screen at once can cause problems with orientation and navigation. Split screen modes are possible in which one side presents the enlarged version of the content and the other side presents the non-magnified view of the page, but this uses up screen real estate. Other screen magnifiers will use a picture in picture mode. This presents as an enlarged outlined area over the top of the page wherever the mouse is pointing on the page. It’s best to avoid using multi-column layouts in order to help users with low vision view your content.
Views Using Screen Magnifiers
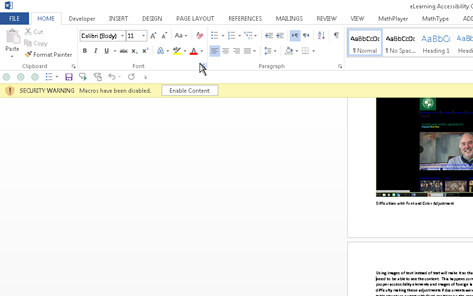
Using MAGic at 2 Times Magnification:
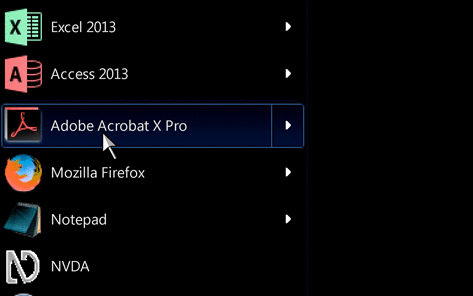
Using MAGic at 5 Times Magnification with Inverted Contrast:
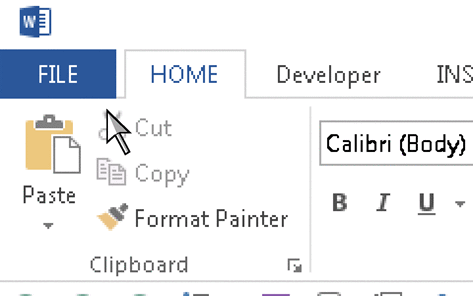
Using MAGic at 8 Times Magnification:
Difficulties with using Screen Magnifiers
When a student uses a screen magnifier they might have trouble with scanning the screen to find specific content they are looking for. This might make performing certain tasks take more time than they would for other students. If images that the student is viewing were produced with a low resolution (usually below 300dpi), the greater the magnification the more difficult it will be to read the content in the image. If color is used for conveying information, an inverted contrast or color filtering might make it impossible to identify the color that the student needs to see. Students using this technology commonly have difficulties perceiving color as well.
Font Style, Color, and Size Adjustment
Unfiltered:

Image of High Contrast White:

Image of a Color Tinted Screen:
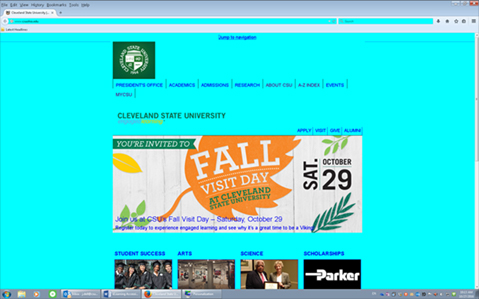
Image of Negative Contrast:
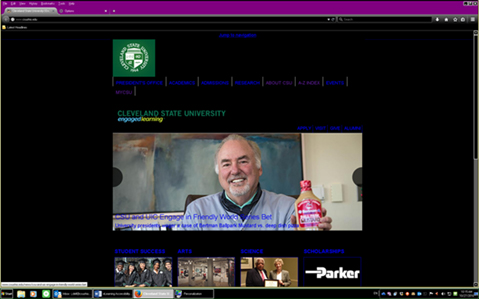
Difficulties with Font and Color Adjustment
Using images of text instead of text will make it so that the person cannot adjust the preferences they need to be able to see the content. This happens commonly when people use PDF documents without proper accessibility elements, images of foreign language or images of mathematical text. People can have difficulty making these adjustments if documents were prepared with spacing instead of using proper table structure or multi-column layout in Word. People also have difficulty making adjustments with a screen magnification program when text with fixed positions on the page are used, such as when text is put in text boxes with fixed sizes to create a callout. When enlarged, the text can overlap or be displayed in an order that no longer makes sense. If color is used as the only method for providing information, when the color is changed it might nullify the message.
Printed Content
Students with low vision will also sometimes print online documents to make adjustments like those seen in the images above. Students who do this typically are looking to make the text larger, or make the colors less busy, so that they can print an easier to read document. Students with low vision also use handheld magnifiers or electronic magnifiers which can apply tinting or invert the colors of the printed document. If the student is not able to customize the printed document, it may make the document harder or even impossible to read with the magnifier. Elements that make this harder to accomplish are text embedded into images, customizing colors inside of individual PowerPoint slides instead of within a PowerPoint theme slide, and using floating textboxes in Word.


