VoiceOver is the built-in screen reader for iOS devices. For people who are blind, VoiceOver converts the information on the screen into formats that are more accessible, such as audio and Braille (when the iOS device is connected to a Bluetooth Braille display). VoiceOver navigation can be performed in one of two ways:
- Drag your finger around the screen to hear what is under your finger (including items in the status bar and the Dock). When you want to select an item (i.e. open an app, turn on a setting) double-tap anywhere on the screen (this is the same as a single tap when VoiceOver is turned off).
- Use gestures: flick left or right to move the VoiceOver cursor (the black square that determines what VoiceOver will read back) then double-tap to make a selection (i.e open an app, turn on a setting).
In iOS 8, Apple added Alex, its natural-sounding voice previously only available on the Mac. As on the Mac, Alex is not limited to VoiceOver, but will work with other iOS speech technologies such as Speak Selection and the new Speak Screen (more on those later). However, note that not all devices are supported (check the Apple website to see if yours is on the supported list), and Siri still has its own voice rather than using Alex.
Building on the handwriting-recognition feature introduced in iOS 7, iOS 8 also supports Braille input. Both of these special input modes are accessed through the Rotor, a special gesture for accessing many VoiceOver settings and navigation options, which involves placing two fingers on the screen and turning a virtual dial.
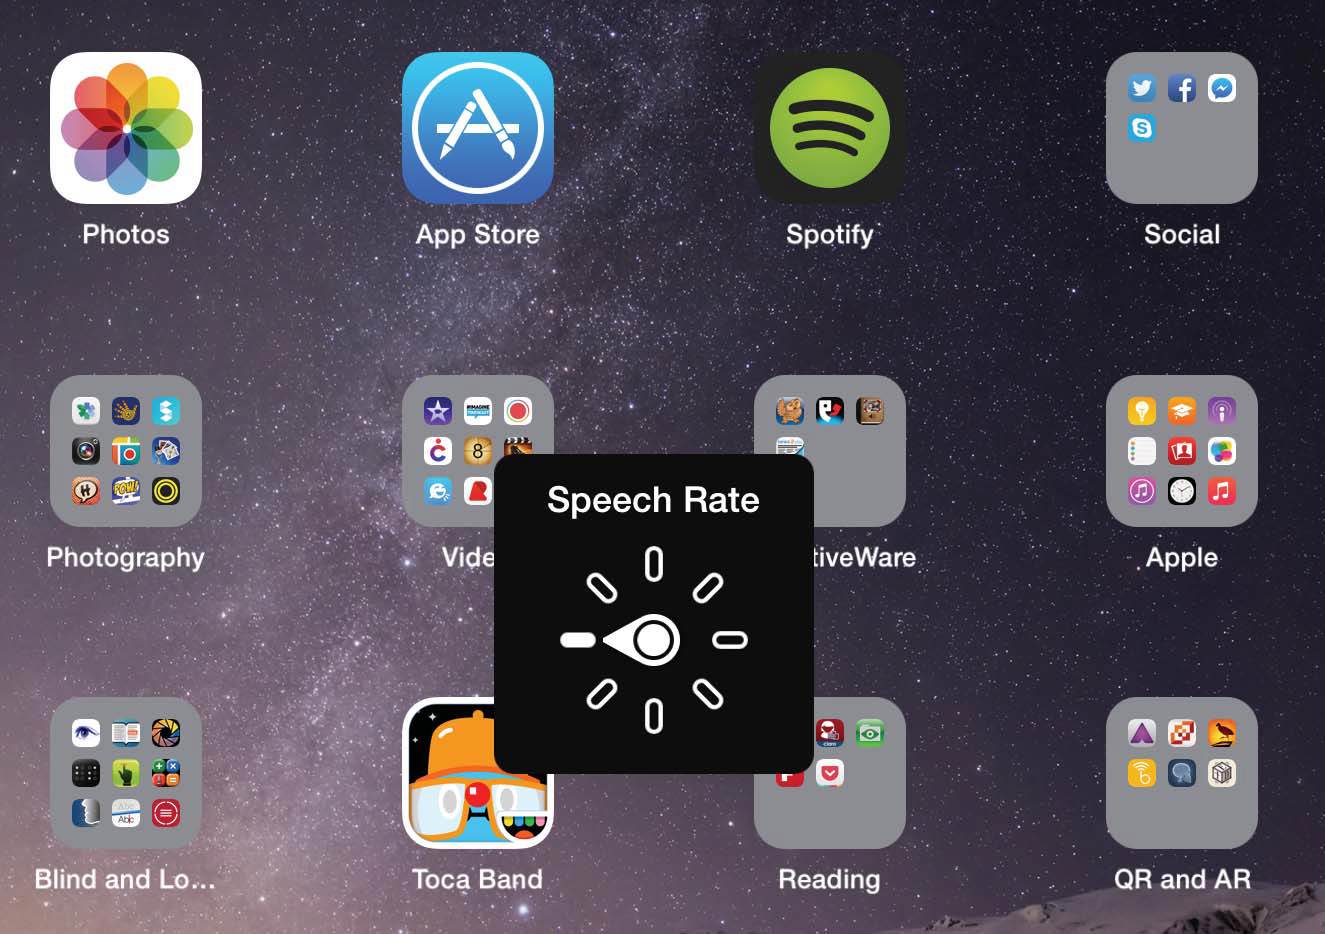
Figure \(\PageIndex{1}\): The Rotor with Speech Rate selected.
The Rotor is contextual, and the options that are available will depend on what you are doing. However, you can add and remove options from the Rotor by going to Accessibility > VoiceOver > Rotor and making sure only the options you want to be available in the Rotor have a checkmark next to them.
In my opinion, command of the Rotor gesture and its options is what allows a VoiceOver user to get the most out of this powerful screen reader and take its use to the next level, beyond basic flick and swipe gestures.
With the Rotor, you can:
- adjust VoiceOver settings such as the speech rate and volume at any time, without having to leave a web page or email to go into Settings;
- navigate web pages by using the page’s structural elements, such as headings, links, form elements, and more;
- edit text by accessing options such as copy, paste, and replace; and
- access the previously mentioned special input modes, Handwriting and Braille Input.
Handwriting, which was introduced in iOS 7, can be used to search for apps, enter text, or navigate web pages by drawing letters on the screen. For example, to search for the Camera app, you would turn the Rotor to select Handwriting, then draw the first letter of the app’s name (in this case “C”) on the screen to hear a list of all apps that start with that letter. While navigating a web page with the Safari browser you can draw the letter “H” to navigate a web page by headings, the letter “L” to navigate by links, and so on. The Handwriting feature supports the following gestures:
- Three-finger swipe up or down: switch between upper-case, lower-case, numbers, and punctuation.
- Two-finger swipe left: deletes the last character.
- Two-finger swipe right: adds a space.
- Three-finger swipe right: adds a new line when entering text.
- Two-finger swipe up or down on the Home screen: navigates a list of apps once you have entered a few letters to narrow down your search (apps do not have to be on your Home screen, they can be anywhere on your device).
- Two-finger swipe up or down in Safari: navigates a list of headings, links or any other element you have selected by writing the corresponding letter first (H for heading, L for link and so on).
[video]
Alex and Braille Screen Input in iOS 8 Video: https://www.youtube.com/watch?v=DYUHiIlIrPk
The Braille Input feature involves the use of an onscreen 6-dot Braille keyboard that will translate 6-dot chords into text (on the iPad’s bigger screen you can also enable 8-dot Braille input). Two modes for Braille input are supported: screen away mode and table top mode. In screen away mode, the device can be held with the screen facing away from the user and the Braille dots will appear on the right and left edges of the screen. In table top mode, the dots are arranged in the shape of the letter V when the device is placed on a tabletop or other flat surface. For the Braille input mode, some of the supported gestures include:
- One-finger swipe left: deletes the most recent character.
- One-finger swipe right: adds a space.
- Two-finger swipe right (while entering text): adds a new line.
- Two-finger swipe right (on a Home screen): opens the selected app.
- One-finger swipe up/down while entering text: accesses typing suggestions.
- One-finger swipe up or down while on a Home screen: navigates a list of apps that start with the letters you started typing.
- One-finger swipe up or down in Safari: moves by the element whose letter you entered (headings, links, etc.).
- Three-finger swipe left or right: toggles between contracted and uncontracted (called “six dot”) braille (on iPads, eight dot braille is also an option)
- Hold with one finger on the screen: enter “explore mode,” where you can move a finger around to find the different dot positions.
You can exit out of either of the two special input modes (Handwriting and Braille) by performing a scrub gesture (moving two fingers from side to side) or by turning the rotor to a different item (speech rate, words, etc.).
In addition to on-screen Braille input, iOS devices support a number of Bluetooth Braille displays for Braille output. A full list of supported displays is available on the Apple website. Some Braille displays not only convert VoiceOver output to Braille but also support control of the device through a number of buttons built into the display. For example, on some displays you can tap a button on the display to scroll up or down a page or screen.

